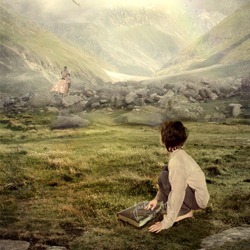
 Blending is the essential skill for every photo manipulator and it´s one of the first things to learn. Without proper blending your images won't look believable. There are several ways how to blend images together. In this article I'd like to cover basic techniques which are essential for every manipulation.
Preview of Final Results
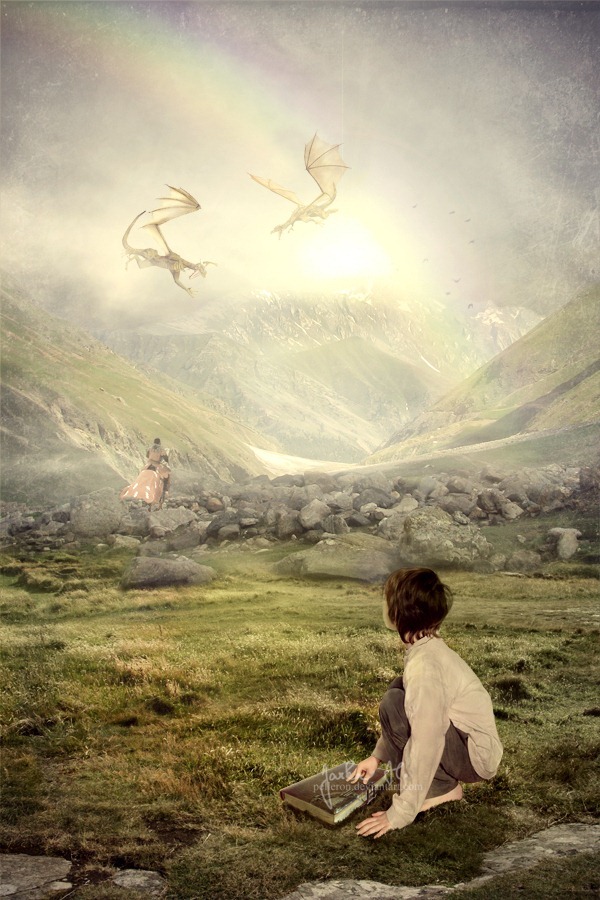
A Photo Manipulator's Guide to Blending
Blending is the essential skill for every photo manipulator and it's one of the first things to learn. Without proper blending your images won´t look believable. There are several ways how to blend images together. In this article I´d like to cover basic techniques which are essential for every manipulation.
In this tutorial you will learn how to blend with:
- Brush Tool and layer mask
- Lasso Tool
- Blending Modes
- Channels
There are plenty other ways how you can blend images together, some of them are more effective, some of them less. This tutorial is meant for the beginners in Photoshop to be able to create their first photo manipulations.
Resources
Before you'll start download following resources.
- Meadow by neverFading-stock
- Mountain from sxc.hu
- Sky by pelleron-stock
- Boy by demoncherrystock
- Book by nightgraue
- Dragon #1 and Dragon #2 by Shoofly-Stock
- Knight by demoncherrystock
- Mist by pelleron
1. Brush Tool and Layer Mask
One of the easiest things to blend are photos of nature similar to the two below. They have similar texture with flat pattern.
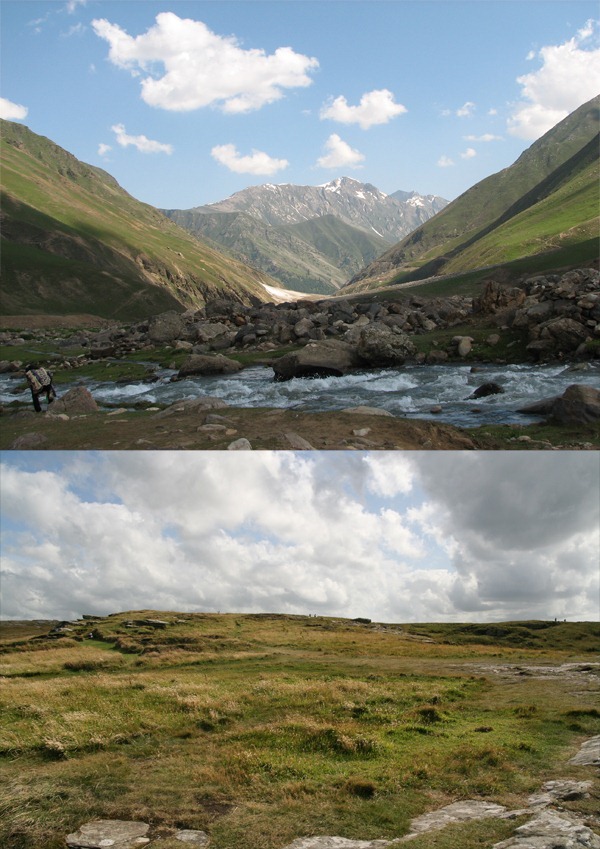
Let´s take a look at how to blend these images.
Step 1 - Naming the Layer
Download the picture of the meadow and open it in Photoshop. For the purposes of this tutorial resize the picture. Go to Image > Image Size and set the value Width on 600 pixels.
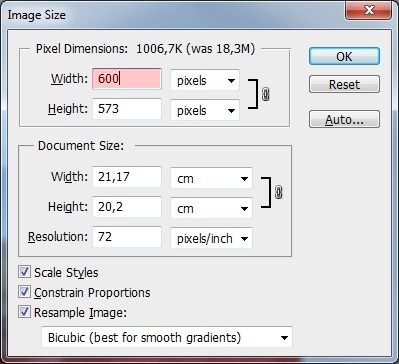
Name the layer MEADOW. You can do it on the palette Layers. It´s very important palette because it shows you from which layers your photo manipulation consists. If you don´t see this palette go to Window > Layers or press F7 on your keyboard. Palette like the one on the following picture appears.
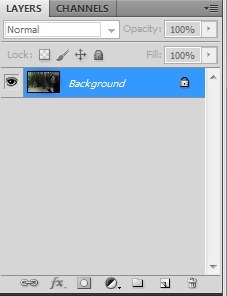
As you can see there is only one layer so far named BACKGROUND. To rename it you need to make the layer editable. Right now it´s locked and because of that you can´t rename it, resize it, move with it etc.
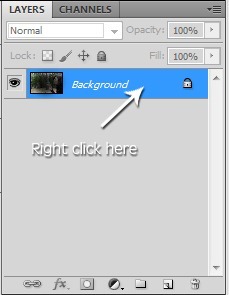
You can unlock the BACKGROUND very easily - right click on the layer and select the option Layer From Background...
Now you can rename the layer. To do that double click on the text Background and type MEADOW.
Right now it may seem unnecessary to name your layer but it´s good to build this habit since the very beggining because once you start doing more complicated photo manipulations it will be hard to orient in all the layers (e. g. I usually work with 50+ layers) if they´re not named.
Step 2 - Dragging the Picture of Mountain
You need to place the mountain into the document with meadow. You can do it very easily. Open the picture of the mountain in Photoshop and then simply drag it into the second document.
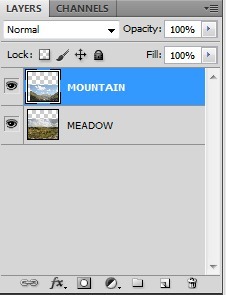
Name the layer with mountain MOUNTAIN by double clicking on the text Layer 1. Your layers should look like on the picture below.
Step 3 - Resize the Mountain
The picture of mountain is much bigger than the rest of the image. It needs to be resized. To do that go to Image > Free Transform or press Ctrl + T on your keyboard.
Small squares arround the edges appear. Move with one of them to make the image smaller. While doing it hold Shift on your keyboard - it resizes the picture proportionally.
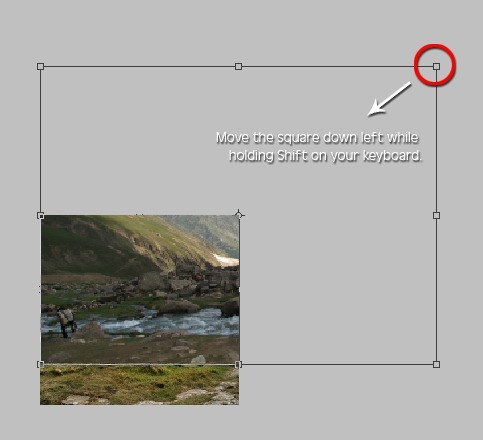
Press Enter on your keyboard when the size is set.
Step 4 - Canvas size
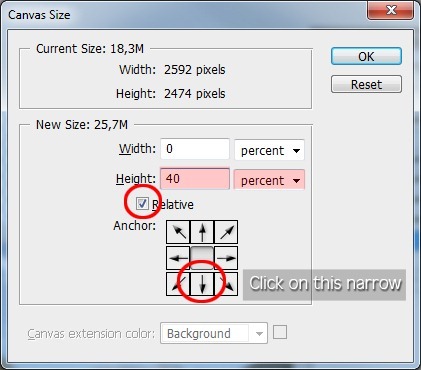
As you can surely see the canvas size is too small. The canvas should be higher because right now you can´t see the whole mountain. To do that go to Image > Canvas Size and set it as on the following picture.
Click on the circled narrow. It causes that the canvas becomes bigger only in the upper part.
Step 5 - Moving the Mountain
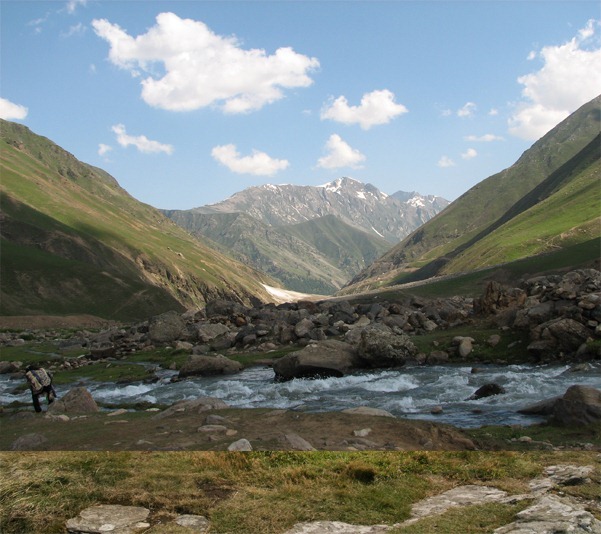
The canvas is already big enough so you can move with the mountain. To do that grab the Move Tool (V). You can activate it by pressing V on your keyboard or by clicking on its icon.

Make sure that the MOUNTAIN layer is active - simply click on it in the Layers palette and move it to get similar picture as the one below.
Step 6 - Adding Layer Mask
There is a lot of tutorials on the internet which recommend blending with the Eraser Tool (E). I strongly recommend you to don´t use the Eraser Tool for blending. It erases parts of the image and it´s really hard, often impossible to get them back when you realize that you made some mistake during blending and need to reverse your actions.
I´d like to show you the alternative with the same effect but with the ability to let appear "erased" part of the image any time you want. To do that you will use the Brush Tool and the layer mask.
To add layer mask click on the button Add layer mask in the bottom part of the Layers palette.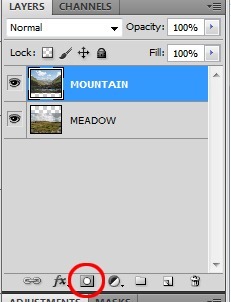
Layer mask thumbnail appears next to the MOUNTAIN.
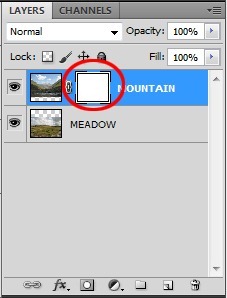
If you paint on the layer mask with black part the image dissapears, if you paint with white it appears again. If you paint with e.g. 50% grey color, image will be 50% invisible.
Step 7 - Blending
Make sure that the layer mask is active - simply click on the thumbnail. Grab the Brush Tool (B) - press B on your keyboard or click on the icon of the tool.

Select some soft round brush, set Master Diameter on 80 pixels and lower the opacity of the brush on about 50%.
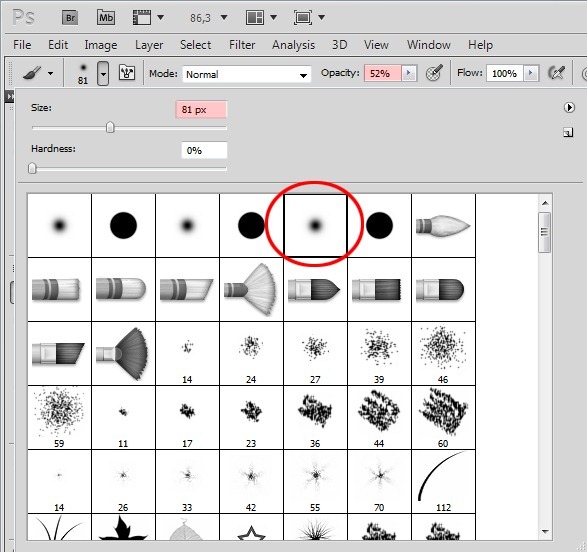
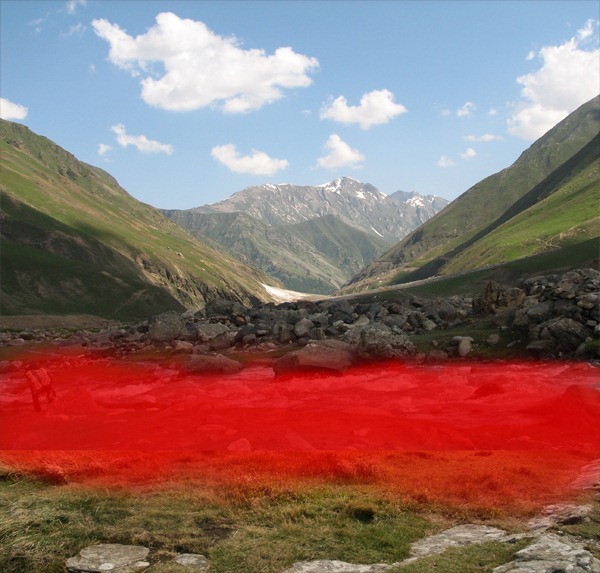
Step 8 - Correct the Mistakes
Zoom in on 100% and carefuly look if you blend everything well. If you hide something which should be visible pick white color instead of black and paint over.
Conclusion
As you may see this type of blending is very easy and not so much time consuming. It´s ideal when the only thing you need to do to blend pictures properly is to create smooth transition between them.
Despite the fact that it´s really easy method be very precise with theblending. Usually more time you spend on blending more realistic result you get.
It´s very good to zoom in to see if all the details are well blended.
Advantage of this type of blending is that everything is reversable in any time. If you want to hide something you just add layer mask and paint with black over it. If you want to make it visible you´ll paint with white instead of black.
2. Lasso Tool
The Lasso Tool (L) is great universal tool if you need to cut out the background of some object. Some people prefer to use the Pen Tool (P) instead but according to me the the Lasso Tool is easy to use and since this is tutorial for beginners I´ll focus on the Lasso Tool (L).
There are three variations of the Lasso Tool - Lasso Tool, Polygonal Lasso Tool and Magnetic Lasso Tool. In this tutorial you´ll learn how to use the Polygonal Lasso Tool.

There are four modes of Lasso Tool. The first three are usually used the most.

1 - New selection - if this mode is active, the Lasso Tool always creates new selection even if you already have some part of the picture selected
2 - Add to selection - you will use this mode most of the time when cutting out the background
3 - Substract from selection - another very frequently used mode
4 - Intersect with selection
2 - Add to selection - you will use this mode most of the time when cutting out the background
3 - Substract from selection - another very frequently used mode
4 - Intersect with selection
Step 1 - Cutting Out the Background
Open the photo of the boy in Photoshop. Click on the icon of the Lasso Tool or press L on your keyboard to activate the tool.

Select the "Add to selection" mode of the tool. Zoom in on 200% to be able to see every little detail of the picture. To make a selection with the Lasso Tool simply drag the lasso around the area you want to select. On the picture below I painted red line on part of the borders to show you where to drag it.
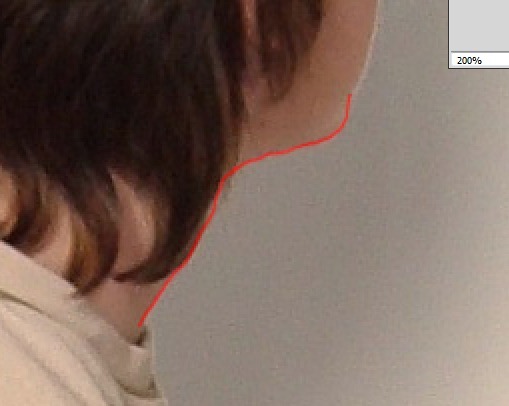
To complete the selection simply double click inside the selected area.
You don´t need to care much about hair. I´ll show you another way how to easily blend them later.
Using the Lasso Tool can be little time consuming but I recommend you to be as precise as possible because only precise selection can give you great looking photo manipulation. And be especially precise with selecting the hands because every little mistake can cause that the hands will look weird and scary.
The selection should look like on the picture below.
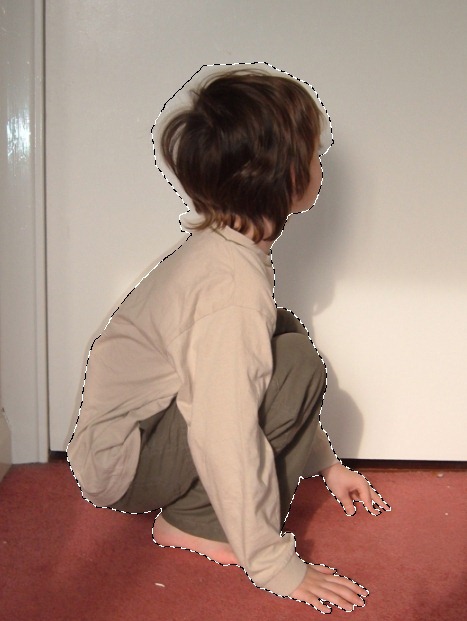
Step 2 - Feather
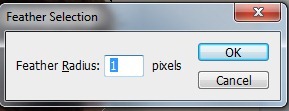
The edges of the selection are very hard now and it doesn´t look realistic. To make them soften go to Selection > Feather (it may vary in different versions of Photoshop) or press Shift + F6 on your keyboard. Set the value Feather Radius on 1 pixel and press OK.
Step 3 - Resizing
Press Ctrl + C on your keyboard to copy the selection. Go to the manipulation and press Ctrl + V to paste the boy.
Place the layer with boy on the top of all layers and name it BOY.
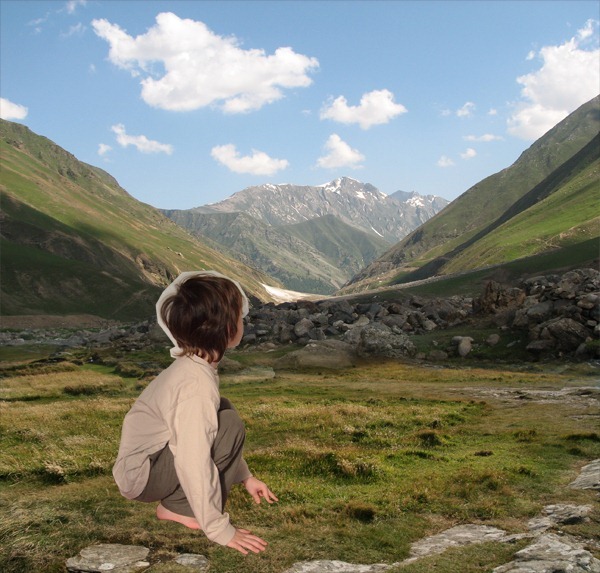
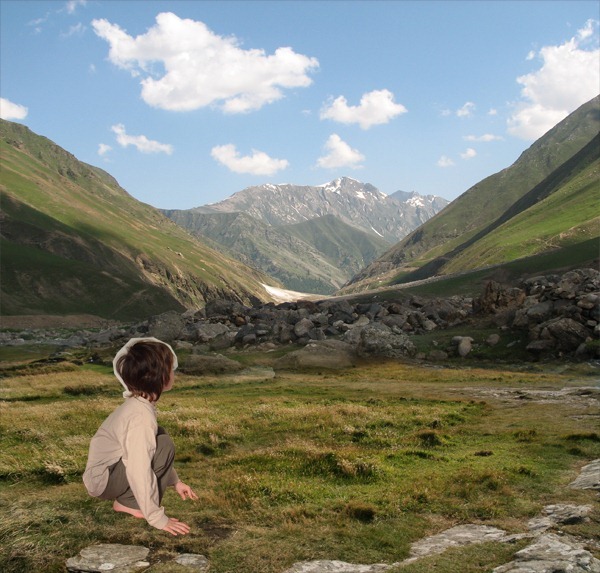
As you can see on the picture above the boy should be smaller. You can resize it the same way as you do it in previous steps. Press Ctrl + T on your keyboard make the boy smaller.
After this step your image should look like the one below.
Step 4 - Changing the Angle
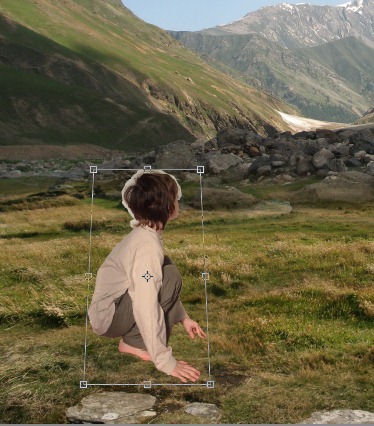
The angle in which the photo of the boy was taken is little different than the angle of the meadow. It would look better if you change the angle of the boy gently. To do that go to Edit > Transform > Perspective. The grid appears. Set it as on the following picture and press Enter on your keyboard .
Conclusion
Using of the Lasso Tool (L) can be little time consuming but it gives you the most controll over the selection process. To get realistic result be very precise with selection. To select correctly all the details zoom in on 100% and more. Be very careful with selecting hands and face. Every mistake you make with selection of these parts is very easily noticable.
After few uses of the Lasso Tool you´ll get practise and the whole selection process will be quicker.
3. Channels
Using Channels for selection is more advanced method but I´d like to mention it in this tutorial because in some cases it can save a lot of time. It´s priceless for making selection e.g. trees on the horizon. You´ll use this method to quickly select the sky in your picture.
Step 1 - Choosing the Channel
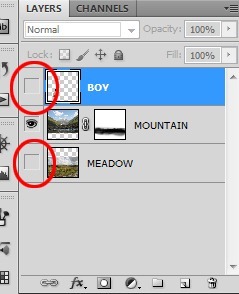
Before you start working with Channels make all layers except the MOUNTAIN invisible. To do that click on the eye icon on the left side of the layers.
Open the palette Channels. To do that go to Window > Channels and it will appear. On the palette you can see RGB and separated red, green and blue channel.
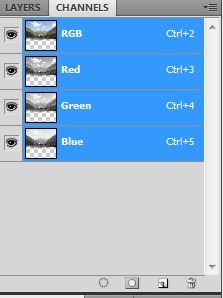
Duplicate the channel where is the highest contrast between the sky and the mounation. In this case it is the Blue Channel. To duplicate it right click on the Blue Channel and select the option Duplicate Channel.
Make all channels except the Blue copy channel invisible by clicking on the eye icon.
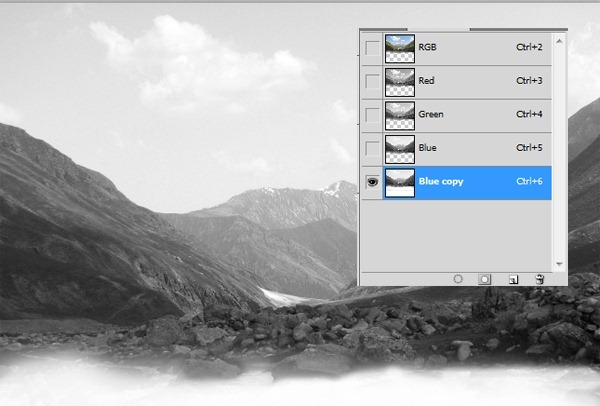
Step 2 - Adjusting the Channel with Levels
To create the mask you need to make the sky white and the mountain black (it works similarly as layer mask which was mentioned in previous parts of the tutorial). To do that go to Image > Adjustments > Levels and set Input Levels on 150; 0,09; 220 and press OK.
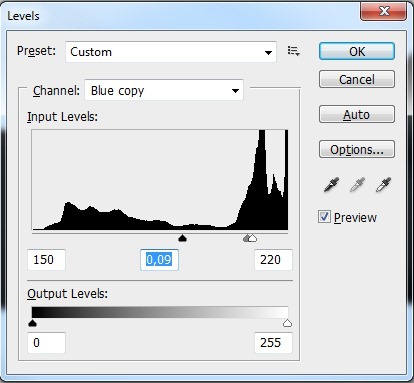
You should get something like on the picture below.
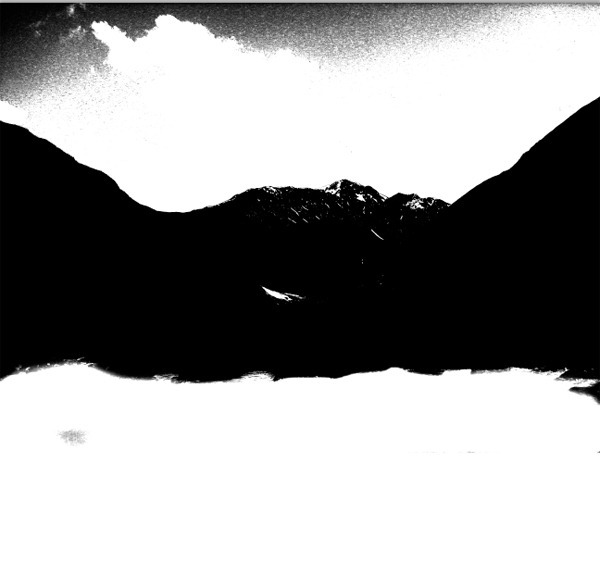
Step 4 - Adjusting the Channel with Brush Tool
The line between sky and mountains is correct. But you need to have the whole sky white and everything else black. You can fix it easily with the Brush Tool. Grab it, pick white color and paint over the sky. Then pick black color and paint over the rest of the image. Be careful around the line between them.
You should get something like on the following picture.
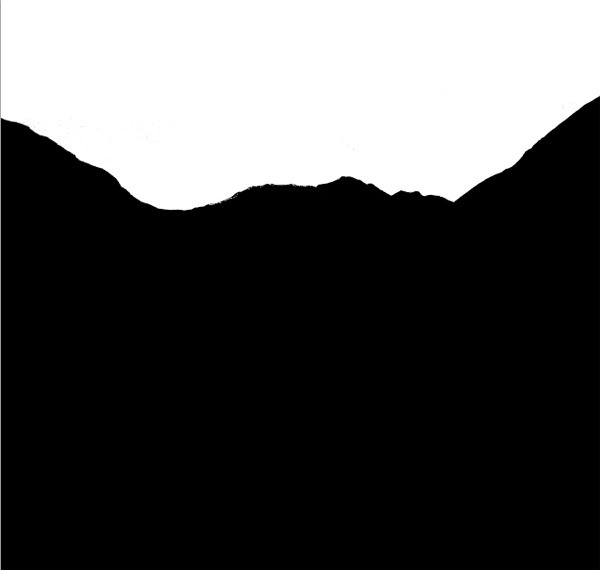
Click on the RGB channel to be able to see the picture in colors again.
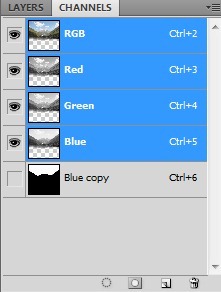
Make also all the layers visible again.
Step 5 - Activate the Mask
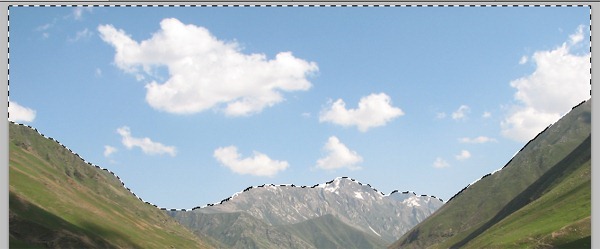
To activate the mask based on the Blue copy channel go to Selection > Load Selection... and set the option Channel on Blue copy. Press OK.
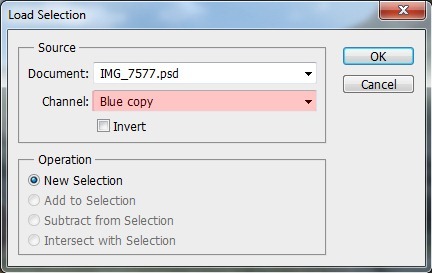
Thanks to it the mask of the sky activates.
Step 6 - Hiding the Sky
To make the sky invisible you´ll use the same method as in the step one.
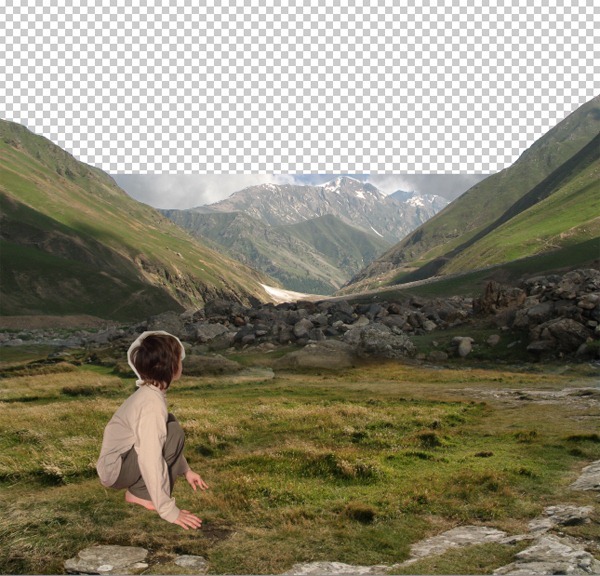
Click on the layer mask of MOUNTAIN. Grab the Brush Tool (B) and pick black color. Paint over the sky. Thanks to the mask you don´t need to take care about where you paint. Mask doesn´t allow you to paint on another place except the sky.
After you´re done deactivate the selection by pressing Ctrl + D on your keyboard or go to Select > Deselect.
Step 7 - Adding New Sky
Open the picture of sky in Photoshop and drag it into your photo manipulation. Place it under MOUNTAIN and name it SKY. Press Ctrl + T and resize it on proper size.
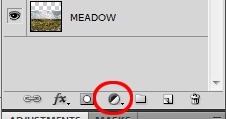
As you may see the SKY is more saturated than the rest of the image and it doesn´t look realistic. To fix it add new adjustment layer Hue/Saturation above the SKY. You can find the button Create new fill or adjustment layer in the bottom part of Layers palette.
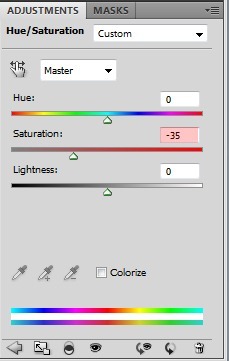
Set the value Saturation on -35.
You want to the adjustment layer affects only the SKY. To do that right click on the Hue/Saturation layer and select the option Create Clipping Mask.
Step 8 - Flipping the Boy
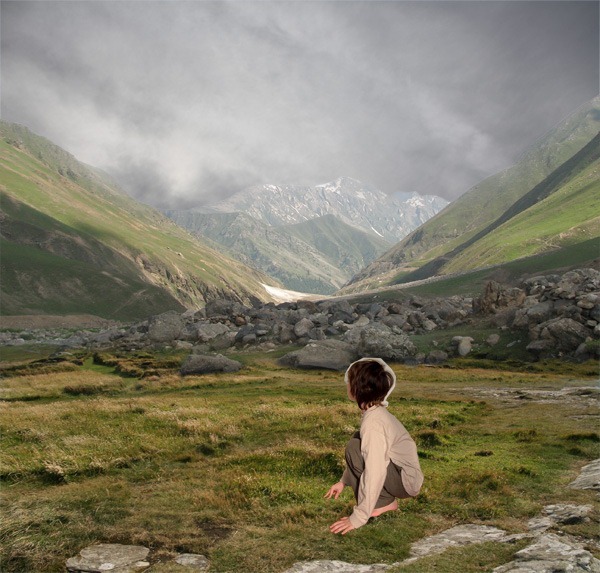
For further composition it would look bether if you flip the boy horizontally and move him on the right. To flip him go to Edit > Transform > Flip Horizontal. Then press V on your keyboard to activate the Move Tool and move him to the right.
The boy should be also little smaller. To do it press Ctrl + T on your keyboard and resize him. After you are satisfied with the size press Enter.
After this step you should have your picture similar to the one shown below.
Conclusion
Using Channels for selection is more advanced method than the previous two but can be very useful if you want to quickly select parts of the images where is big contrast between the background and the object you want to select.
4. Blending Modes
Blending Modes are very powerful tool in Photoshop. They have a lot of uses and deserve separate article. But right now I´d like to show you how you can effectively use them for blending hairs.
Step 1 - Selecting Hairs
Grab the Lasso Tool (L). Click on the layer BOY and make selection similar as shown below.
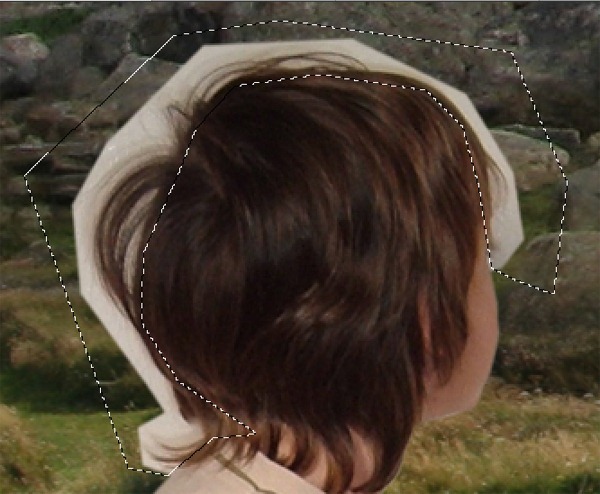
Press Ctrl + C to copy the selection and Ctrl + V to paste it. Name this new layer e.g. HAIR and place it under the layer BOY.
Step 2 - Blending Hair
It would be quite complicated and time consuming to make selection of every hair strand with the Lasso Tool (L). If you want to blend darker hair on lighter background changing the Blending Mode is the right way how to do that.
Make the layer BOY invisible - click on the eye icon on the left.
Now change the Blending Mode on Multiply. You can find the option Set the blending mode for the layer in the upper part of the Layers palette.
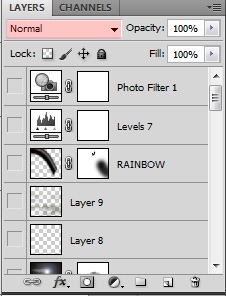
If you click on it you can see a lot of different modes for blending. Each is very useful and I would recommend you to start using them. In this step you will use Multiply Blending Mode and later also Screen.
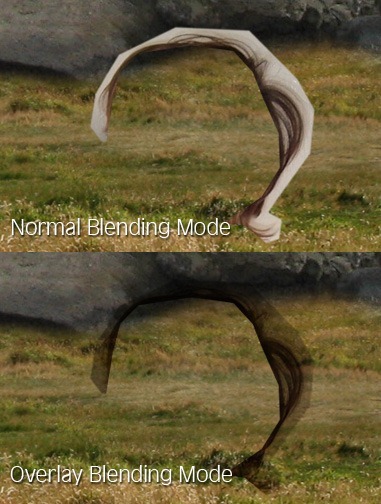
As I said change the Blending Mode of HAIR on Multiply. Below you can see how hair look with Normal and Multiply Blending Mode.
Step 3 - Adjusting Hair
As you may see on the picture above hair are not properly blended yet - the background is still visible and hair are darker than original. You can easily fix that with Levels.
Add new adjustment layer Levels above HAIR and set the Input Levels on 0; 1,95; 147.
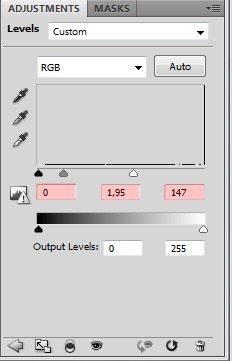
Create clipping mask from this layer to adjusts only HAIR and not all the layers below.
After this step HAIR should look like as shown below.
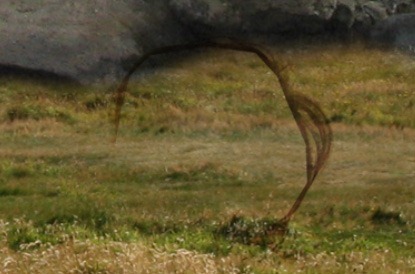
Step 4 - Blending the Boy
Make BOY visible again. Because it is above the layer HAIR you can´t see the well blended hair from previous steps. To make them visible you need to hide hair of the BOY.
To do that add new layer mask to the layer BOY. Grab the Brush Tool by pressing B on your keyboard or clicking on the icon of the tool. Select some soft round brush, set the Master Diamer on 10 pixels and pick black color. Now paint over the hair you want to hide. The layer BOY (with invisible layer HAIR) shloud look like on the following picture.
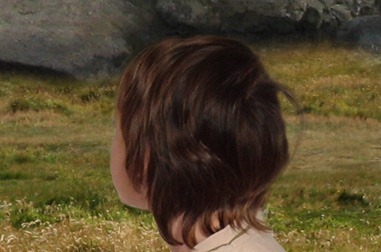
And with HAIR visible it should look like this.
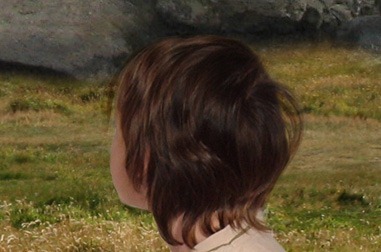
Conclusion
Blending Modes are really powerful option for blending more complicate images such as hair, fire, textures etc. I´d recommend you to try and experiment with them to see how useful they are.
Finishing the Picture
The aim of this tutorial is to show you different methods of blending pictures. All methods I want to described are above so you can finish reading. But I believe that you´d like to know how to finish the picture and make a complete photo manipulation. I´ll briefly describe it in following steps.
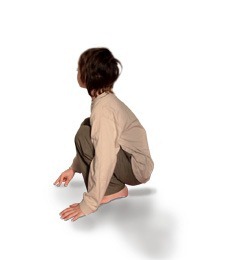
Step 1 - Shadow Under the Boy
Right now the boy doesn´t fit into the whole scene. Mostly it´s because he has no shadow under his legs and there is also no reflected shadow from his body. You´ll fix it in this step.
Add new layer under the BOY and name it e.g. BOYS SHADOW. Change Blending Mode of this layer on Multiply.
Grab the Brush Tool (B), set Master Diameter on 5 pixels and Opacity on 75%. Pick some dark green color and paint thin line under the boy´s feet and part of the fingers where he touches the ground.
Lower the Opacity of the brush on 35% and paint the shadow reflected by the boy. On the picture below you can see the shadow I painted.
Step 2 - Adding Mist
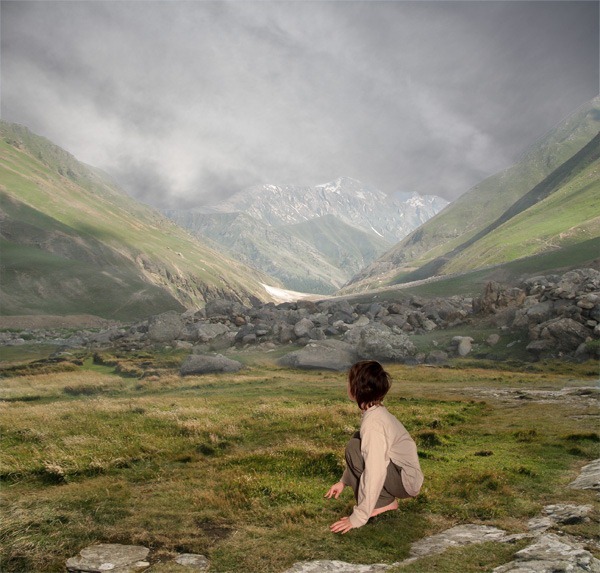
The great way how you can create mysterious atmosphere in your picture is by adding mist. You´ll do it in this step.
Add new layer above BOYS SHADOW and name it MIST. Download the mist brushes and install them into Photoshop. If you don´t know how to install brushes you can take a look at this tutorial.
Grab the Brush Tool (B) and select one of the brushes you´ve just installed. Pick some very light yellow color and gently paint over the mountain. Below you can see how your picture should look after this step.
Step 3 - Adding the Book
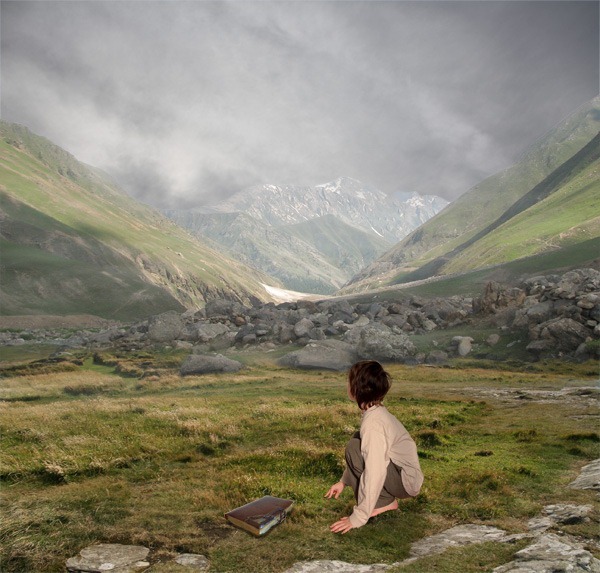
Open the picture of the book in Photoshop. Grab the Lasso Tool (L) and select it. Then drag the selection into your photo manipulation. Name the layer BOOK.
Press Ctrl + T on your keyboard and make it smaller. Rotate it to it has the same direction as on the preview picture.
There should be shadows under the book. You can add them the same way how you added shadows to the boy. Add new layer under the BOOK and name it e.g. BOOKS SHADOW. Change the Blending Mode on Multiply, grab the Brush Tool (B) and paint shadows.
Step 4 - Adding Dragons
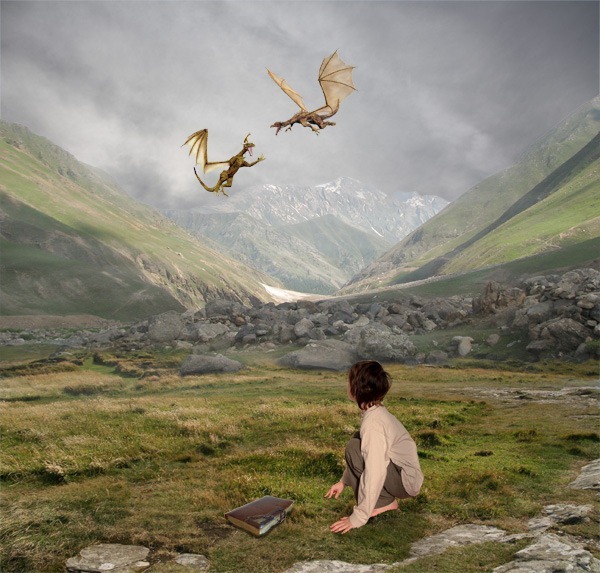
Open the pictures of dragons and drag them into your manipulation. Resize them by pressing Ctrl + T and place them as on the preview picture.
The dragon lower needs a little color adjustments because it´s too dark and much saturated. To make him lighter add new adjustment layer above the layer with the dragon and set the Input Levels on 5; 1,86; 255. To lower the saturation add new adjustment layer Hue/Saturation and set the value Saturation on -40.
Create Clipping Masks from both ajustment layers.
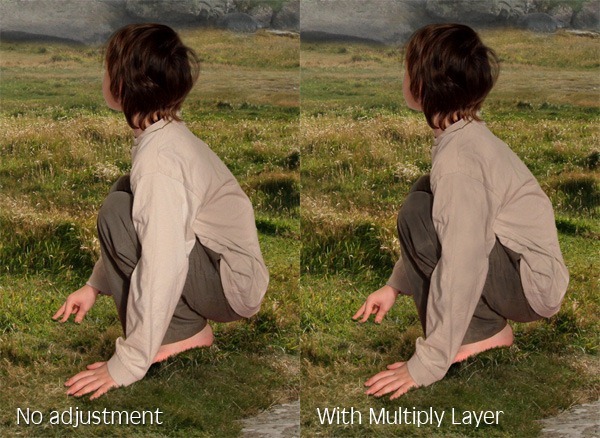
Step 5 - Darkening the Sleeve
The stock photo of the boy was taken during different light condition than in our scene. Because of that the sleeve is too bright. You´ll fix it in this step.
Add new layer above BOY and name e.g. SHADOWS. Change the Blending Mode of this layer on Multiply.
Grab the Brush Tool (B), set the Master Diameter on about 20 pixels and lower the opacity of the brush on 15%. Pick some color from darker part of the shirt and paint over the sleeve. Below you can see how the sleeve looks before and after this adjustment.
Step 6 - Adding Lights
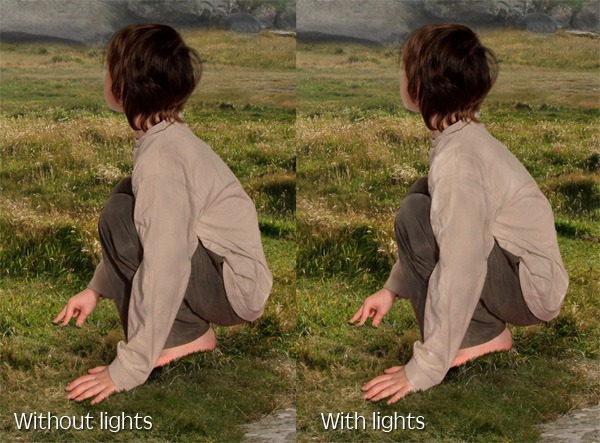
There should be some lights on the boy because of the lighter sky in the middle.
Add new layer above SHADOWS and name it LIGHTS. Change the Blending Mode of this layer on Screen. Grab the Brush Tool (B), pick some light color from the shirt and paint lights. After you´re done with the shirt move on trousers, hair and face.
On the picture below you can get inspiration where to paint.
Step 7 - Adding the Light Source
Light in the manipulation is quite boring yet. You´ll do it more dramatic in this step.
Add new layer on the top of all layers and name it LIGHT SOURCE. Grab the Gradient Tool (G) amd fill the layer with solid black color. Go to Filter > Render > Lens Flare... and set the window as on the following picture.
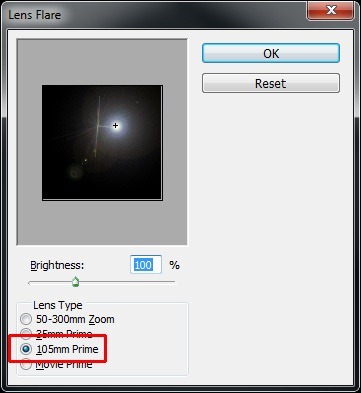
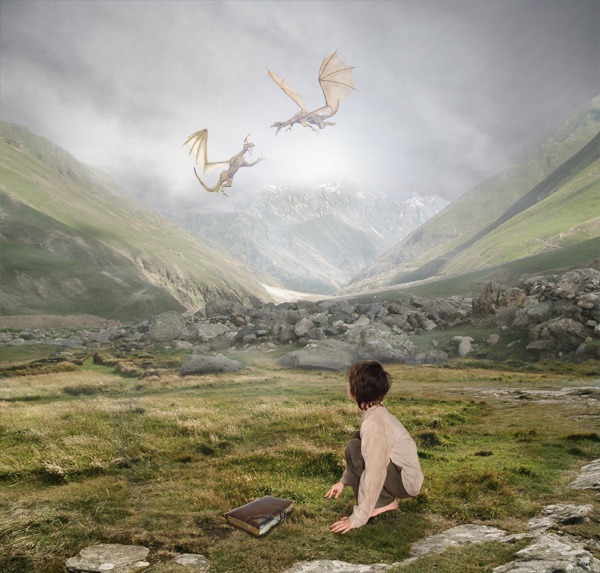
Change the Blending Mode of this layer on Screen and lower the opacity on 90%. After this step your photo manipulation should be similar to the picture below.
Step 8 - Adding the Knight
Open the picture of the knight in Photoshop. Use the Lasso Tool (L) to cut out the background and drag him into your picture. Name the layer KNIGHT. Press Ctrl + T and resize him on proper size.
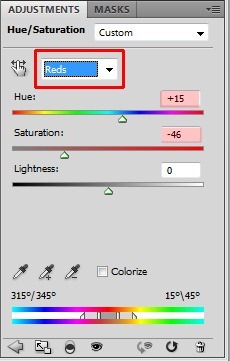
KNIGHT is too saturated and too red which doesn´t fit to the rest of the image. To fix it add new adjustment layer Hue/Saturation and set it as shown below.
Step 9 - Global Color Adjustment
It´s time for some more color adjustments. The manipualtion would look better with higher contrast. To increase it add new adjustment layer Levels on the top of all layers and set the Input Levels on 14; 1,00; 250.
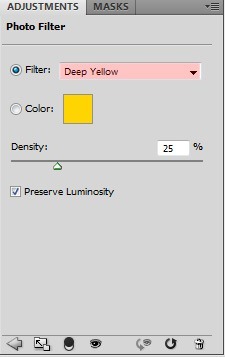
The picture would also look better with more yellow tones. You can easily add them by adding adjustment layer Photo Filter on the top of all layers. Choose Deep Yellow Filter.
Step 10 - Cropping
It shows up that the square format of the picture doesn´t work very well for this picture. It would look better cropped. To do that grab the Crop Tool (C), set the Width on 2 cm and Height on 3 cm and crop it.
Step 11 - Final Touch
There are two more things which need to be done before finishing the picture - adding vignette and shaprening.
Let´s begin with vignette. Add new layer on the top of all layers and name it VIGNETTE. Grab the Brush Tool (G) and fill it with solid white color. Now go to Filter > Lens Correction (the path may vary in different versions of Photoshop, if you can´t find it simply press Shift + Ctrl + R on your keyboard) and set the window as shown below.
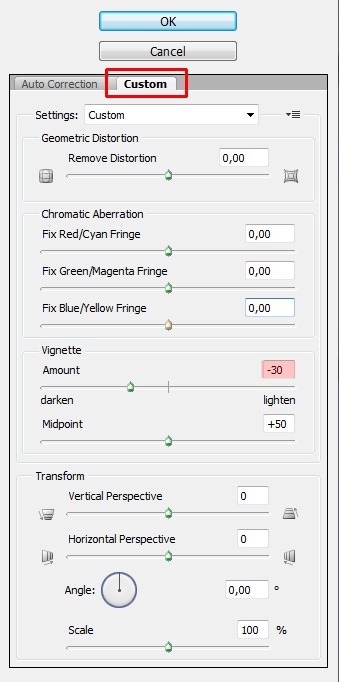
Change the Blending Mode of this layer on Multiply.
To sharpen the image press Ctrl + A to select the whole picture and then Ctrl + Shift + C to copy it merged. Paste the merged image on the top of all layers and name it SHARPENING. Go to Filter > Other > High Pass and set the value Radius on 1,0 pixel. Press OK and change the Blending Mode of this layer on Overlay.
One last thing - move with the BOOK and BOOK SHADOW under the boys hand. It will look better.
Final Results
![preview[1] preview[1]](http://photoshoptutorials.ws/images/stories/743ec1ea8469_2C1B/preview1.jpg)


